DIY Hand-Painted Flower Vase – a Fast and Easy Project
Some DIY tutorials are more about the overall idea itself than about the process; this tutorial is one of them. A blackness-and-white striped vase is zero groundbreaking, frankly. But the beautiful thing about this particular project is its pure and utter uniqueness – even though blackness and white stripes are classic and accept been around forever, your particular striped vase volition be entirely unique considering you created information technology with your own hands and your own aesthetic and way in listen.
 View in gallery
 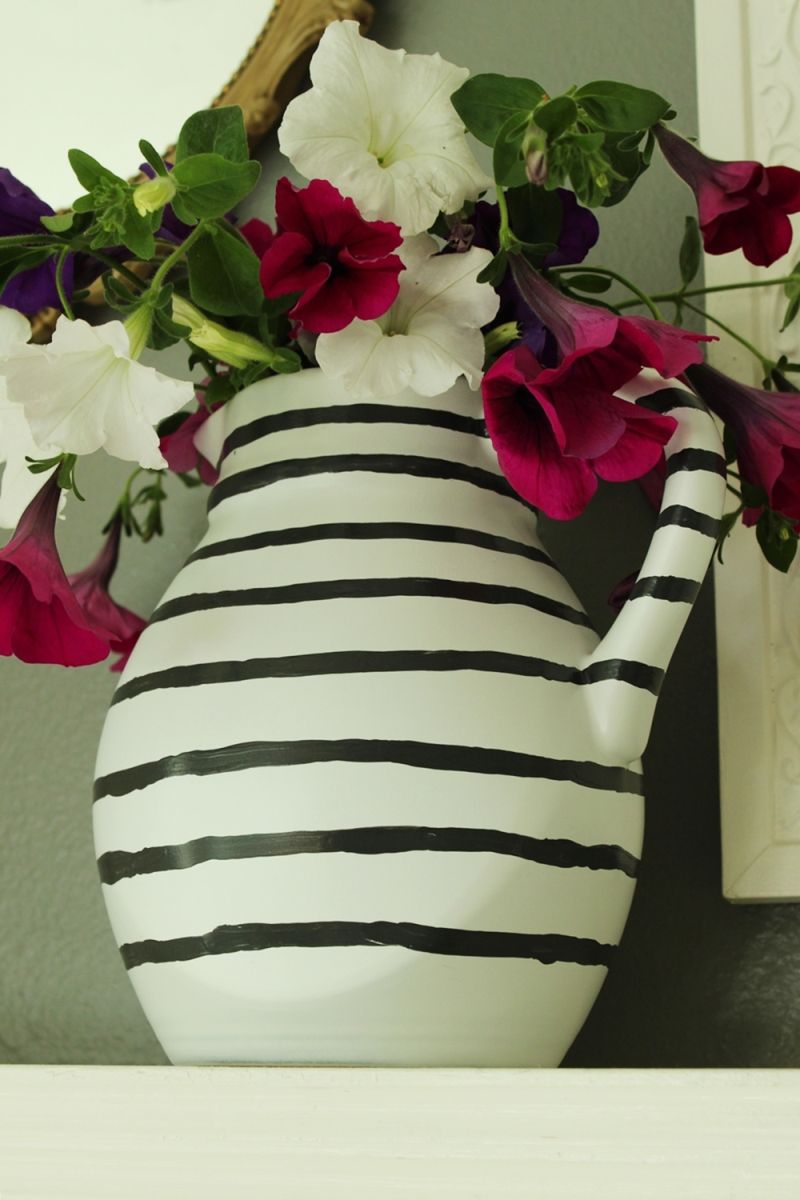 View in gallery
 Here'southward how I went about creating this i; experience free to alter information technology as you like.
DIY Level: Easy
 View in gallery
 Materials Needed:
- One (one) vase of your choice (example uses an old ceramic jug/pitcher)
- Spray pigment in the base color of your choice (example uses white paint + primer in one)
- Latex pigment in the stripe color of your choice (example uses Glidden's Evening Hush)
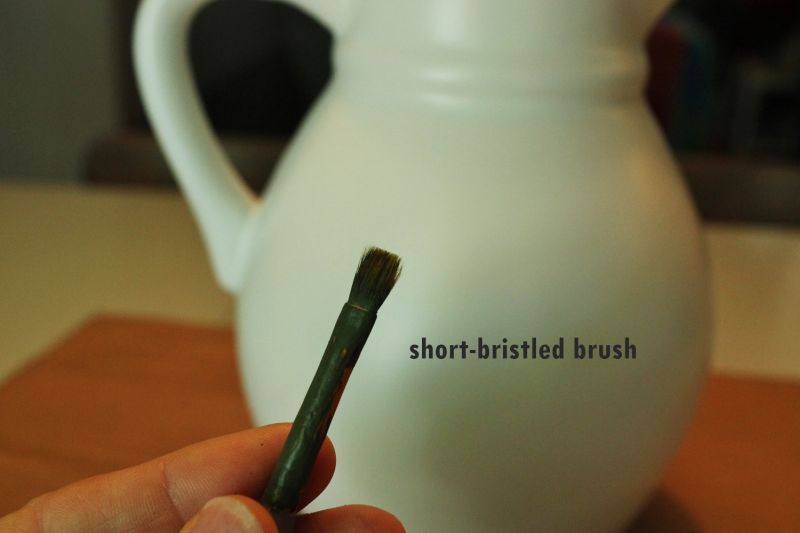
- Curt-bristled castor in the width/thickness of your choice for stripes
 View in gallery
 Ensure your vase is completely clean and dry out. Fix information technology on a pigment protective surface, such every bit an former sheet. Tip: When spray painting an object all the way to the bottom, elevate it with an object placed nether the paint canvas. Example shows a roll of painter's tape under the canvass, which is then under the pitcher. Spray paint can is set there for height reference. This but makes it easier to see all parts and sides of the object to be painted, maximizing the chances for complete painting coverage.
 View in gallery
 Milk shake up your can of spray paint according to directions, about a minute. Hold can upright about a pes away, and begin spraying.
 View in gallery
 You may have heard this earlier, but it bears repeating because it is CRITICAL to a successful, even, professional-looking spray paint task: Use light strokes in multiple coats, with several minutes of drying time betwixt each coat. Don't try to cover the whole affair on the first glaze; it'll only cease upwards runny and drippy and blotchy, even (especially) with spray paint.
 View in gallery
 This is the second coat of paint; I am going for light strokes for each coat rather than a comprehensive coating in 1 pass. You'll discover that there is notwithstanding a bit of blotchiness in the white paint, particularly near the lesser of the vase. This is fine! Necessary, even. Just let it be for a few minutes, and then hit it once more with your third coat.
 View in gallery
 It took until my tertiary coat of spray paint was complete to actually end up with a nice, polish, even, and consistent coat of paint. It might simply take yous two. Or it might take you 4. Or 8. My point is that, with spray painting, it actually doesn't matter how many coats it takes you to go that fifty-fifty look you're after, as long equally each coat is sprayed lightly, information technology'll get there. And it'll be smooth.
 View in gallery
 When your vase is completely dry with its base coat, it'southward time to add the stripes. This is the fun, well-nigh therapeutic part of this DIY project. It will take a little while, though, so brand yourself comfortable, plow on some tunes, and channel your inner artiste. Also, grab your short-bristled paint castor.
 View in gallery
 Dip just the tip of the paint brush into your paint. Tip: Pour a little paint into a disposable plastic lid or something similar, and so your paint source is quite shallow. This makes it easier and more efficient to dip simply the tip of your bristles into the paint each time. You lot will likely need to re-dip often.
 View in gallery
 Start at the elevation of your vase, simply considering you're going to want to steady your paw against the vase itself as you're painting these stripes, and you can't do this when you lot pigment from the bottom upward. Also, paint each stripe in its entirety (effectually the vase) earlier moving onto the next.
 View in gallery
 The shape of the vase you chose might be quite simple to maintain a horizontal stripe on, or information technology might be a niggling more challenging. Whatever its shape, try to maintain a flat/level horizontal line beyond the vase itself no matter the topography.
 View in gallery
 Maintaining a horizontal stripe was a challenge with the spout and handle of this jug, but it was quite helpful to keep my eyeline level while painting and refer to the starting level of the line oftentimes.
 View in gallery
 Exist aware that, as you're making this first pass at all the stripes, they're not going to exist perfect. The stripes will likely vary a little as well much in thickness and in coverage. That's okay. Just curl with it at this point. If yous first messing effectually, trying to make each stripe perfect without looking at all the stripes equally a whole unit, things are likely to go downhill rather fast.
 View in gallery
 Instead of perfection of the stripes themselves, focus for the showtime coat of stripe paint on placement and position – your priority here is keeping them level and evenly spaced.
 View in gallery
 Subsequently the first coat of pigment dries (which is does quickly), it's time to go back and brand some touchups. With all the stripes marked, yous can now make up one's mind but how thick you desire the stripes to be, and but how much imperfection in their edges you lot want. I happen to be comfy with (prefer, even) a lot of "wiggle" in my stripes, so I didn't try to md their shape up too much.
 View in gallery
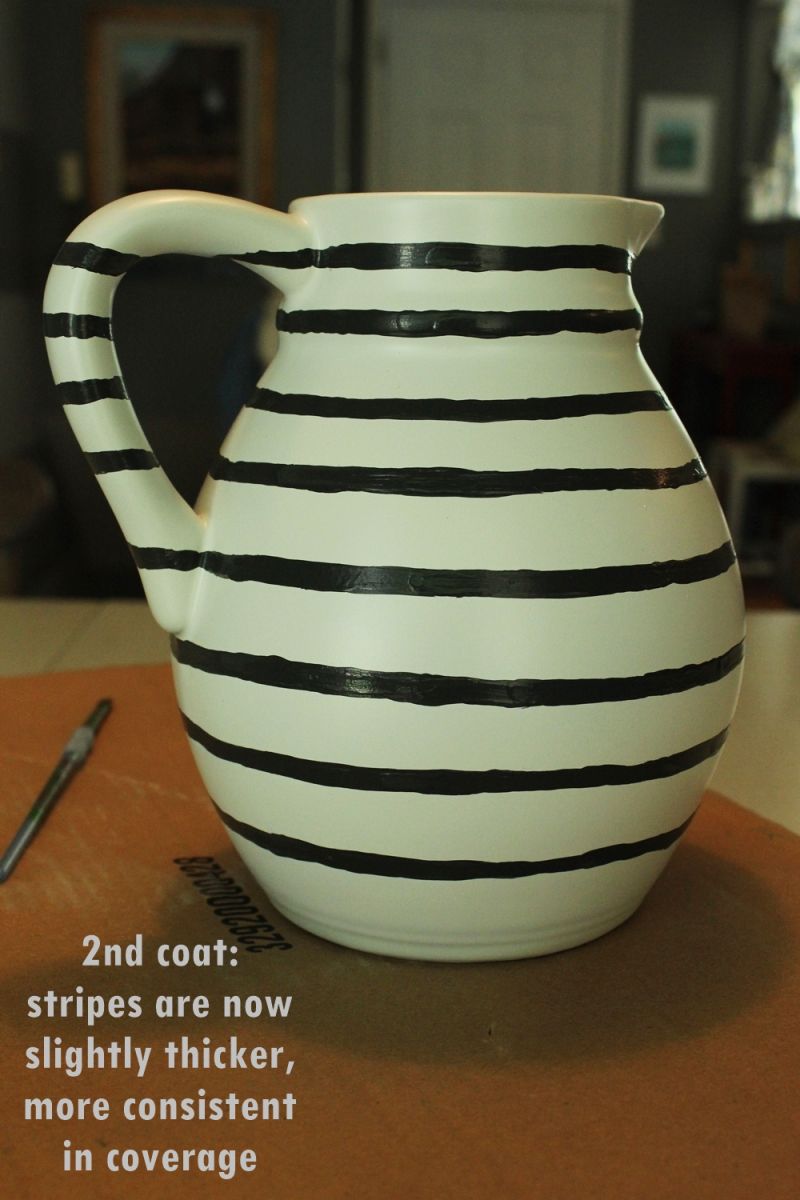
 Instead, I focused on filling them in to be pretty consistent with each other. And if in that location were glaring bumps on the edges/sides of the stripes, I used this 2d pass with the stripe paint to even those out as well. Again, work from acme to bottom on this.
 View in gallery
 As you may be able to tell, my stripes ended upwardly a bit thicker and with consistent fill after the 2d glaze. When the stripes are in identify with the first coat, they serve as kind of a "road map" of sorts to permit your preferred artful to come through with the 2d coat. When y'all don't have to worry well-nigh the stripes' placement and positioning, yous can really get the stripe look you love.
 View in gallery
 Let it all dry. Congrats! You're done! Decide where in your house you want the vase to be shown off, now that you're an upwards-and-coming artist. Kind of.
 View in gallery
 Maybe yous honey the await of your vase merely as it is. Display information technology solo or in a vignette, and y'all're certain to feel proud when it's noticed and complimented.
 View in gallery
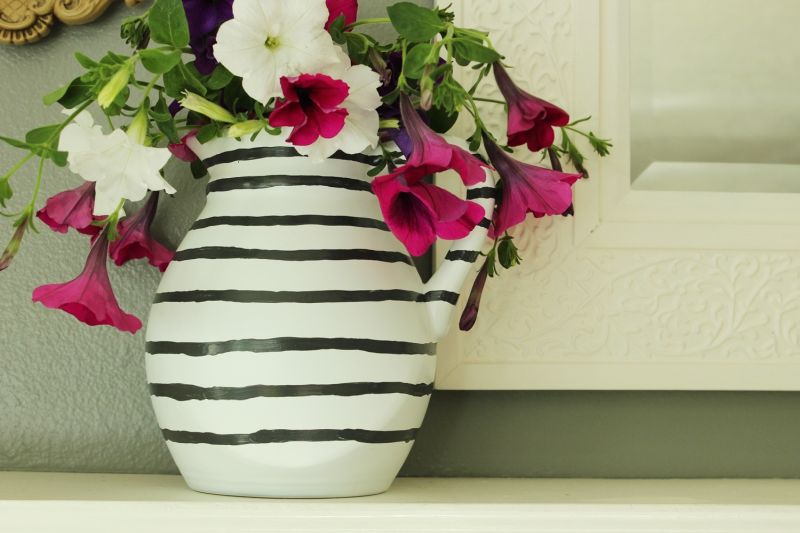
 But, in general, I happen to autumn into the schoolhouse of thought of: what'due south a vase without flowers? Fill it upward, quick, that'south what I say. A few floppy petunias from the garden look cheery and lucifer the don't-have-yourself-as well-seriously vibe of the hand-painted vase, anyway.
 View in gallery
 Ane of the beauties of paw-painted anything is its perfect imperfection. Of class, nosotros could've taped this entire thing off to create perfectly fifty-fifty, direct stripes. But that wasn't the point hither.
 View in gallery
 You could definitely alter up the artful of this project in a diverseness of ways. White stripes on black, for example. Or thicker stripes, wider spaces, thinner stripes, narrower spaces, uneven spacing, thicker stripes down low condign thinner up top…the possibilities are exciting, aren't they?
 View in gallery
 Ultimately, we just hope that you've been able to create a piece that y'all absolutely love and that suits your infinite.
Source: https://www.homedit.com/diy-hand-painted-flower-vase/
0 Response to "DIY Hand-Painted Flower Vase – a Fast and Easy Project"
Post a Comment